Wednesday, September 12, 2012

Fruit This Summer

I did not get the chance to plant a garden this Summer so I missed that thrill of eating something fresh out of your own garden.  Without a doubt, everything and anything that you've grown on your own tastes 1000% better than anything and everything ever known to man.  This is #fact.

I searched high and low for some sweet and flavorful fruit and I was disappointed so much this season.  I believe this is the first Summer that I didn't have any watermelon, cantaloupe, or honey dew that made my heart flutter.  I've had a few fresh pineapples that were more sour than sweet.  I can't even begin to tell you how many berries and grapes I purchased that had no flavor what-so-ever.

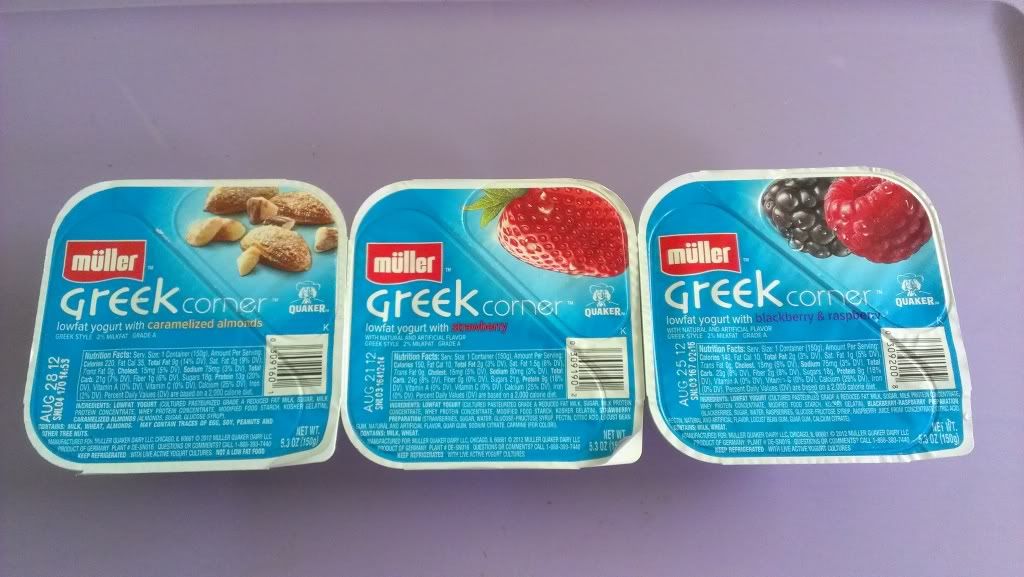
As a person who is not into cakes, pies, and the like, my sweet tooth started to get fed with Debbie Cakes, soda pop, and fruit-flavored candy.  While they served it's purpose, I was not satisfied with any of those things.  They were way too sweet.  I started to feel like I was in a Alfred Hitchcock book and someone was trying to kill me slowly by sprinkling poisoning over my food and in my drinks.

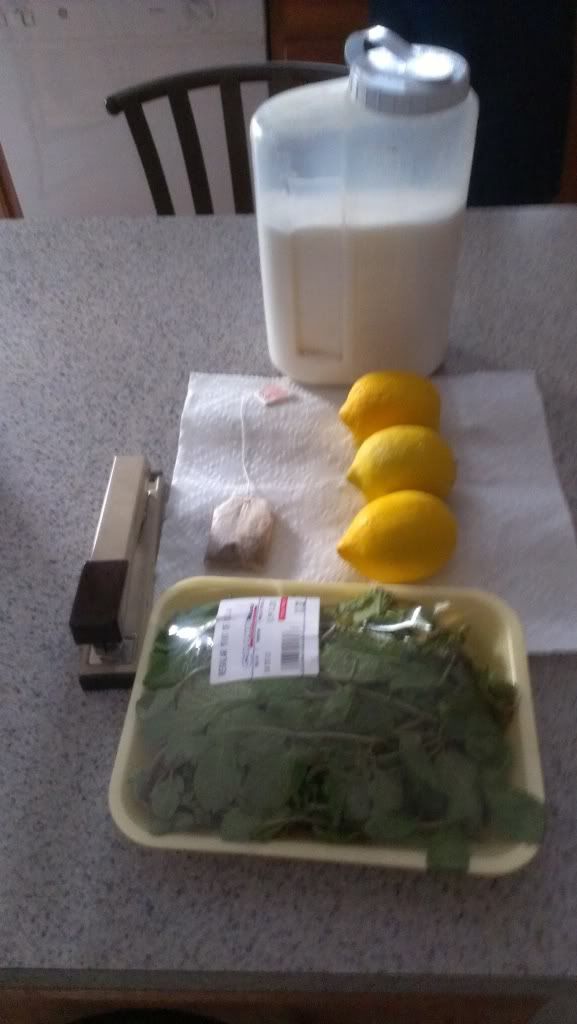
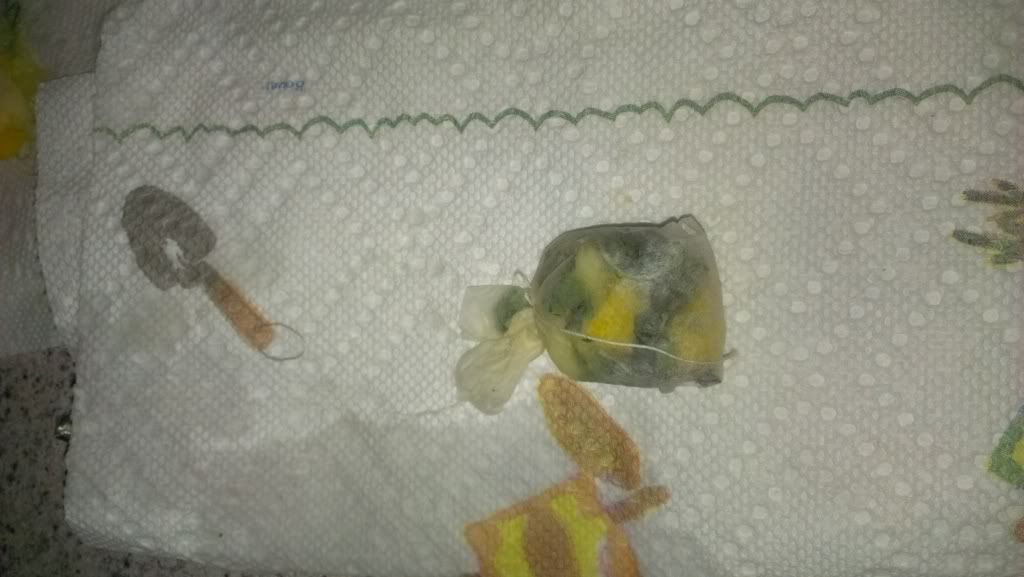
I don't want to have another Summer like this one.  Next time the warm gardening season gears up I'm going to be ready.  I hope to have the space to plant a fruit tree or two.  If the crops I buy out of the grocery store aren't going to be sweet enough to calm my sweet tooth cravings, then I'll just make it so that I have no one to blame but myself if my fruit doesn't come out right.


Smooches!

Thursday, September 6, 2012

Broke Food Chronicles


Dear Akoma,

So I kinda pissed my girlfriend off by acting like a douche bag in front of her friends.  She's been giving me the ice queen treatment for days.  I put my foot in my mouth and told her I'd cook a romantic dinner for her this weekend.  Dude, I don't know how to cook AND I've only got $25 to pull this off.  I got butter, flour, water, whole white mushrooms, a box of linguine, and a bottle of this stuff:


I'm totally screwed.  Help!

---DoucheMan in Charleston, SC


Dear DoucheMan,

I've got the perfect dish to make for your girlfriend and you won't break the bank.

Ingredients

1/2 Box of linguine pasta 
1 Bag of ez peel large, deveined shrimp, shelled
2 Tablespoons of butter 
1 Carton or 2 cups of whole white mushrooms, chopped
1 Cup of water
3 Tablespoons of flour 
2 Tablespoons of butter
1 Teaspoon garlic, minced 
1 1/2 Teaspoon of Italian seasoning
2 Teaspoons garlic pepper
1 Cup of pasta water, reserved
1 1/2 teaspoon Tony Chachere's Creole Seasoning, Original 


Make your own slideshow at Animoto.

Directions

1. Rinse and pat dry your shelled shrimp.  Coat the shrimp in 1 teaspoon of Tony Chachere's Creole Seasoning and 1 teaspoon of garlic pepper seasoning.

2. Bring a large pot of water to a boil.  Add linguine and cook for 5 minutes.  The pasta should still be slightly stiff.  Drain, but reserve one cup of the water to use later.

3. Thoroughly rinse that pot and place back on the stove on a medium-low heat.  Add 2 tablespoons of butter and 1/2 teaspoon of Italian seasoning.  Add mushrooms and cook for 2 minutes or until browned.  Remove from the pot.

4. Place 3 tablespoons of flour into a bowl.  Briskly stir the flour while slowly adding water until you get to one full cup added.  Stir until completely mixed and all lumps are removed.  

5. Add 1 cup of pasta water, 2 tablespoons of butter, the flour/water mixture, and the mixed garlic to the pot.  Increase the temperature to medium-high and stir continuously. Make sure to get all lumps out.

6. Once the sauce thickens, add the shrimp, the remaining garlic pepper and Tony Chachere's Creole Seasoning and let cook for 3 minutes.

7.  Turn the temperature down to medium-low and add mushrooms and linguine.  Cover the pot with a lid and let cook for 5 minutes.

I recommend going to Big Lots to get most of your ingredients.  You can get:

Tony Chachere's Creole Seasoning 3.25 oz ($1.50)
Jar of Minced Garlic ($1)
Garlic Pepper ($0.50)
Italian Seasoning ($0.50)
2 Candles ($2)

Your local grocery store, Food Lion, has shrimp on sale.  You can get a bag for $7.99.  Get the cheapest, prettiest flowers that you can find.  Or, buy one single rose to give to her.  It should cost no more than $5.

Set the table with lighted candles, your chilled wine, and her flower(s).  Use the best plates and silverware that you have and for goodness sakes behave as undouche-like as humanly possible.  Women tend to brag to their girlfriends about their boyfriends.  I'm sure she's mortified that you didn't live up to the greatness that her friends expected.

Oh, and LEARN SOMETHING FROM THIS!


Smooches!


Tuesday, August 28, 2012

Whars Da Beef?

As I'm trying to become healthier, I've been substituting some ingredients or adding things to increase the healthfulness (is that even a word?!) of my food.  Many of the recipes that include beef often tell you to use lean turkey instead.  Well, that may be okay for some, but many times I end up asking myself, "Where's the beef?"


I used to get a kick out of this commercial.  This woman was serious about her beef and she needed answers...STAT!  If you've never seen this commercial, take a moment to check it out now.


Meatloaf was one of the first recipes that I tried to substitute turkey for beef.  Honestly, when it was fresh out of the oven and drizzled in low-sodium gravy, it was delicious.  However, it was rock hard the next day.  I've tried all sorts of tips to keep the ground turkey moist, but it just doesn't work.  I've been using ground white turkey, but I suspect that other people are using ground dark turkey for their recipes.  They don't sell that in any of the stores in my area, but maybe they have it elsewhere.

I found a meatloaf recipe in the Extreme Fat Smash Diet book by Dr. Ian K. Smith.  It was right on the money and very delicious.  It allows you to mix in lean ground beef.  I've modified it slightly but I can honestly say that I don't miss regular meatloaf at all.

Ingredients

1 Pound of ground chuck (90% lean)
1 Pound of ground turkey  (ground chicken is just as tasty)
1/2 Cup of Egg Beaters
2 Tablespoons of tomato paste or ketchup
1 Small white onion diced finely
1 Snack pack of baby carrots diced finely
1/4 cup of celery diced finely
1 Tablespoon of Italian seasoning
2 Tablespoons of Italian croutons crushed into breadcrumbs
Salt and pepper to taste


Try our slideshow creator at Animoto.


Directions

1. Preheat oven to 350 degrees

2. Combine all ingredients in a bowl and mix well with your hands (gloved if you have long nails)

3. Form the mixture into four small loaves

4. Bake on a rimmed baking sheet for 35-45 minutes, or until the juices bubbling around the loaves run clear.


Smooches!

Friday, August 10, 2012

Toufayan Bakeries

I absolutely adore the products that this company makes.  It's not terribly expensive and their products are made right here in the United States of America.

I was actually introduced to this product by happenstance.  My father asked me to make him some spaghetti and garlic bread.  I was happy to do so because my parents love when I prepare that meal for them.  However, my mom always seemed disappointed that she could only have a small portion of garlic bread. Bread contains carbohydrates and sugars that are not healthy for diabetics to consume in great quantities.

I went to my neighborhood market and asked a woman in the bakery what type of bread she would recommend for a diabetic.  She pointed me in the direction of this pita bread made by Toufayan Bakeries.  The low-carb pita bread contains 0 grams of sugar and only 16 grams of total carbohydrates.  I made the garlic pita bread that night and since then, I've used many of their varieties and have never been disappointed.

Here is the recipe for the garlic-herb butter that I spread on my pita bread.

Ingredients

1 Package of Toufayan Bakeries pita bread (any variety)
3 Tablespoons of I Can't Believe It's Not Butter (softened)
1 Tablespoon and 1 teaspoon of garlic powder
1 Teaspoon of dried parsley flakes
1 Teaspoon of dried basil leaves


Make your own photo slideshow at Animoto.

Directions

1. Preheat oven to 350 degrees

2. Mix butter, garlic, and herbs in a small bowl

3. Line a baking pan with non-stick aluminum foil

4. Spread the garlic-herb butter on top of the pita bread and place onto the baking pan

5. Bake for 7 minutes and then change the oven temperature to broil

6. Broil for 1-2 minutes or until the pita bread crisps along the edges


Smooches!

Friday, August 3, 2012

Foodie Review

Are you a sucker for the people who give out samples in the grocery store? I am! This weekend I tried a new product by Quaker and I am in love.


 Here's the description of the product from their Facebook page:

About Delightfully creamy and deliciously fun to eat, Müller™ yogurt is a totally new taste you can scoop, swirl, or dip any time of day. 

Description 
Müller™ yogurt, beloved in Europe for generations, is now available on this side of the pond thanks to The Quaker Oats Company and Müller. Müller yogurt comes in many varieties and flavor experiences to try. Müller™ FrütUp™ yogurt is a brand new way to enjoy parfait-style yogurt with a light, airy fruit mousse on top. Müller™ Corner™ and Müller™ Greek Corner™, popular in the U.K., each have a two-chamber cup that includes creamy yogurt in one chamber and delicious mix-ins like fruit, caramelized almonds, crunchy cereal and chocolate in the other. All Müller yogurt is made from reduced-fat milk and is a good source of calcium and protein. Once you taste it, there’s just one word to describe it – YUM! For now, Müller yogurt is available at most grocery stores in the Northeast and mid-Atlantic section of the country, but keep in touch -- we will be expanding soon (check out our store locator). For all of you about to try this totally new taste – our spoons salute you! Happy mixing! 

What's 2 Love:

* This yogurt is very creamy and rich.  It still has the sharp, tangy flavor that is associated with Greek yogurt, but is also slightly sweet and very smooth.

* I like that you can control how much of the mix-in flavor you want to add to your yogurt.  Sometimes when you buy premixed yogurt it seems like you are tasting everything but the yogurt itself.  You don't have that problem with this yogurt because they give you just enough for it to be thoroughly mixed.

* They come in yum-tastic flavors.  I purchased three different types (strawberry, blackberry & raspberry, and caramelized almonds).  I have no complaints about the way they taste.  I'm pretty shocked that I like the yogurt that doesn't have any fruit.

* They are inexpensive.  I am a big fan of the McDonald's Parfait and this gives me the same feel at a much lower cost per serving.  If you want, you can add your own granola.  I do and it takes this yogurt from being great to out of this world good!


Downers:

* They highlight the fact that this product is made with reduced milk and is packed with protein and calcium.  This is very true, however, it is loaded with sugar.  The three flavors that I purchased have between 18-21 grams of sugar per serving.

* Also, if you are watching your calories this might not be the most efficient way to spend your daily calorie allowance.  The three flavors that I purchased have between 140-220 calories.  This can seem to be a bit much for a snack, but is not that bad if you consume this for breakfast.  For instance my breakfast menu might be:

Black coffee (5 calories)
Blackberry & Raspberry Müller™ yogurt (140 calories)
Bear Naked Banana Granola-1 tsp (12 calories)
Jennie-O Extra Lean Turkey Bacon-1 slice (20 calories)
Whole Wheat Toast-1 slice (100 calories)
1 bottle of water

I get a pretty full and balanced breakfast for under 300 calories.

So, all in all, I give this new product by Quaker 4 out of 5 smiley faces.  They would score better if they provided an option for those who cannot consume products high in sugar.

:) :) :) :)


 Smooches!

Thursday, August 2, 2012

Shh...I've Got Some Pot.......Roast

Word on the e-streets is that I have some pot...roast.  I'm telling you man, one hit of this and you'll be high as a kite. I don't want to brag but people always come back for more after I let them sample a taste.  I can let you try it for free this time, but if you like it, you'll have to give me a little cash.  Oh, you think you're ready to try this pot...roast?  Now I'm not so sure that you can handle it, because this is for the boys and girls in the big leagues.  You seem to still be wet behind the ears.  But since you asked so nicely, I'll oblige your request.

Ingredients:

1/2 cup all-purpose flour
1/4 cup butter
1/4 cup of water
3 1/2 lbs rump roast
1 (10.75 ounce) can condensed cream of mushroom soup
1 small onion course chopped
1 snack pack size of baby carrots
Ground pepper/garlic powder/seasoned salt to taste


Make your own slide show at Animoto.


Directions

1. Preheat Oven to 325 degrees and melt butter in a large frying pan using medium-high heat

2. Thoroughly wash your rump roast and trim excess fat

3. In a mixing bowl, combine flour, seasoned salt, garlic powder and pepper.  I used around 1/4 of a teaspoon of each seasoning.

4. Completely dredge the rump roast in the flour making sure to shake off the excess flour.  Place in the frying pan and brown on each sides.  Once browned, place in a casserole dish with a lid.

5. In mixing bowl, combine the mushroom soup, onion soup mix, water, and onions and pour over the roast

6. Cover and bake for 3 hours.

7. Add carrots and bake until the onions are softened.  You could also add green beans/potatoes to truly make this a one pot meal.


Smooches!

Wednesday, August 1, 2012

Random Food Thoughts: Inappropriate or Weird


I went to Applebees with some friends during happy hour.  Understandably, it was busy, but after over thirty minutes of waiting for our food and drinks, I was incredibly hungry.  The group next to my table had a wide variety of appetizers on their table that caused my stomach to growl loudly and it would not let up.  I could not take it anymore and I asked the group if I could have some of their food.
 /blush

My friends were horrified and time stood still as the people from the other table looked at me like I was an alien.  However, they were gracious enough to allow me to take a few of their appetizers to hold me over until our food orders came.  I bought them a pitcher of beer to show appreciation for their kindness.  This was years ago, but I still wonder if those people think about that night when some greedy, shameless stranger begged them for morsels of food.  I think this one falls under #inappropriate AND #weird


 Smooches!

Monday, July 16, 2012

"I'm going to make him an offer he can't refuse."


One thing that I've learned about myself is that food is a huge motivator.  Apparently, my loved ones were aware of that long before I came to that epiphany.  For a long time I was unaware that I was being manipulated by my loved ones.  I happily went along with each request and looked forward to my hearty reward afterward.  Someone could ask me to paint their whole house and promise me free entry into a crab crack and I'd probably work all day without complaint.  


One day my mother called to tell me that she was making liver, gravy, onions, and rice.  This may not sound like a mouth-watering meal, but you've never had my mom's liver and onions.  Anyway, she asked me if I wanted to come over to get a plate of food.  I was already looking for my keys by then so I assured her that I'd be there in no time.  


This was in the early 2000s when Bluetooth headsets and cellphones weren't given to people straight out the womb.  So, when I forgot to end the call on my headset and my mother forgot to end the call on her cell phone, I heard her telling my father that she was going to trick me into doing chores.  I was livid!  She even had the audacity to laugh at her cunning ways.  Right then I made up my mind to hang up and call her right back to tell her I'd changed my mind.  I would not be coming to her house after all.  However, I heard her mentioning food again.  


All was forgotten.  


I did the chores.  


I got my treat.


Smooches!

Sunday, July 15, 2012

This is a simple recipe...


Have you ever heard that statement when watching a cooking show?  I have, and let me tell you something, the recipes are rarely simple.  It's so frustrating.  Cooking shows, baking shows, food competition shows, and documentaries are guilty pleasures of mine.   And, inevitably, when I'm watching one of my favorites they will entice me with the dish and tell me how easy it is to make.  Let us dissect their theories for a bit, shall we?


Ingredients:

2 cups of fat-free organic beef stock
1/2 cup of vegetable stock
1/2 cup of shrimp stock
4 oz of shark steak (julianned)
1 free range cornish hen
3 cloves of minced garlic
3/4 cup pecorino, grated
1 to 2 tablespoons black currant jam
3/4 cup red wine
6 oz of strawberries (juiced to yield 3 oz of liquid)
1 lb of truffles
1 cup of grapeseed oil
Roasted duck fat
Breadcrumbs made from homemade rosemary and parmesan  bread
2 cups of pumpkin seeds (dried)
7 grams of semi-sweet chocolate (melted)
1 package of extra firm tofu (diced into 1-inch cubes/deep fried in panko)
8 large sprigs epazote, 5 coarsely chopped, 3 left whole

 Prep time:  10 minutes

Recipes with ingredients like this are just absurd.   I'm convinced that these types of recipes aren't even real.  It's just the chef/cook doing a bit of self-preservation.  They are banking on the fact that once most people see the ingredient list, they'll avoid making it at all costs and proclaim the chef/cook a genius.


Now, lets just assume that you've been able to acquire the list of ingredients above.  Now you have to dice, julienne, roast, fry, saute, glaze, stuff, infuse, marinate, braise, sear, thicken, deglaze, puree, blanche, steam, stuff, and steep to make the dish.  You'll have to run to youtube and google just to learn what half of those techniques are before you even begin.


You will need a whole kitchen's showroom of appliances and gadgets to make the dish. 


Try our slideshow creator at Animoto.


By the time you've acquired the ingredients/gadgets, used your appliances and fancy techniques, you've spent $1000.  I don't know about you, but I'd rather just spend that kind of money on a cruise and eat all the fancy dishes I want on board. The icing on the cake is that I won't even have to do the dishes. 


Smooches!

Saturday, July 14, 2012

Early Saturday Morning Breakfasts

I had a wonderful friend when I was a young girl. She lived about a mile south from my house and I would walk over there or she would come to my house practically everyday during our summer breaks from school.

I preferred going to her house because her uncle believed in serving good hearty breakfasts.  He would make things like bacon (turkey for me of course), muffins, pancakes, eggs, omlettes, waffles, biscuits, grits, oatmeal, etc.  I've never been a morning person, but I'd be up with the chickens to get to that kitchen.

Since then, I love having breakfast for dinner.  It's just something about eating delicious breakfast food that puts a smile on my face.  I'll be dreaming of a big country breakfast as I eat my Yoplait yogurt and fruit.

Smooches!

Thursday, July 5, 2012

Pizza! Pizza!

I saw someone eating a slice of pepperoni pizza that looked loaded with fat and salt.  The crust was stuffed and I saw cheese oozing out of the sides.  It was so greasy that it was dripping down her arm.  How could she eat that slice of death in public..............and not share with anyone?  Come on, dude!  That's so rude.  Ha! I made a little poem there; did you catch my genius....dude...rude?  *Sigh* This is why I'm not a comedian for a living.

You can stop mentally judging me now.  I've put that joke behind me, but I was still thinking about that pizza days after I witnessed her euphoric face after having her first bite.  I have a few local pizza places that serve some awesome pizza.  However, they don't deliver and I was too lazy to drive.  Plus, too much fatty pizza is not good for my skin or my waist line.  This recipe is a healthier alternative that still feels like indulgence.

Ingredients

1 jar of pizza sauce
1/4 cup of Kraft Natural Shredded 2% Milk Reduced Fat Mozzarella Cheese
Diced yellow peppers
Diced red peppers
Diced green peppers
Diced onions
1/4 can of mushrooms diced
Turkey pepperoni slices
1 garlic clove
Italian Seasoning
Pepper
McCormick Garlic Seasoning
Flat Bread or Low-Carb thin pizza crust
Butter or Butter cooking spray


Make your own photo slideshow at Animoto.


Directions

1. Preheat Oven to 425 degrees or whatever temperature it states on your packaged crust/flat bread.

2. Take the garlic clove and rub generously all over the crust

3. Sprinkle Italian seasoning on the crust and then 1 whole serving of pizza sauce (make sure to read your label for the serving size) making sure to leave the edges bare.

4. Sprinkle garlic seasoning, pepper and Italian seasoning on top.

5. Add your cheese, veggies, and 1 whole serving of pepperoni slices (read your label for the serving size)

6. Spray the bare edges with a butter spray or one teaspoon of melted butter

7. Place on a sheet of heavy foil and bake for 20-25 minutes


Smooches!

Tuesday, July 3, 2012

Random Food Thoughts: Inappropriate or Weird

I always want to eat a hot dog after I watch an episode of Matlock.


I have fond memories of watching the Andy Griffith  Show and Matlock.The way he dragged his words were characteristic of a North Carolinian and as an NC girl myself, I recognized it instantly.  He passed away today and I pray that his friends, family, and fans hold onto the many good memories he left behind.  May he rest in peace.

Smooches!

Monday, July 2, 2012

CAN-asta!

Canned goods should be staples in every kitchen.  They will be your saving grace in the event of an emergency and your power goes out.  As long as you have a manual can opener/sharp knife and some canned goods, you will be able to eat.  But, canned goods are really great for quick and inexpensive meals that have nutritional value. For example, this whole meal only has 8 ingredients and takes only 15 minutes to make.

Ingredients:

1 can of salmon (drained)
1 medium sized egg
1/4 small white onion
1/4 teaspoon of pepper
1 can of sweet peas (drained)
2 pats of I Can't Believe It's Not Butter 
1 can of Glory Foods butter beans
Vegetable oil

Directions:

Salmon croquettes

1.  Heat oil in a large skillet over medium-high heat.
2.  In a medium bowl, mix together salmon, egg, onion, and pepper with a fork.  This will have to break up some of the small/soft bones.
3.  Form the mixture into tangerine sized balls and then flatten into a patty shape
4.  Place in the skillet and fry until you see a dark ring formed along the edges.  Reduce heat to medium, flip the croquettes over and cook until brown on both sides.

Sweet Peas

1. Put peas in a small bowl with two pats of butter
2. Warm in the microwave for 2 minutes

Butter Beans

1. Put butter beans in a small bowl and microwave for 2 minutes


Try our video maker at Animoto.

This meal is quick, simple, and packed with nutritious goodness.  The butter beans are loaded with fiber, iron, and calcium.  The sweet peas are a great source of vitamin A, vitamin B6, vitamin K, and vitamin C.  The canned salmon is the leading lady of this meal. She gives you omega-3 fatty acids, vitamin D, zinc, protein, iron, potassium, and much more.

Smooches!


Sunday, July 1, 2012

Must Haves vs. Nice to Haves

I made a lot of mistakes when I started buying pots and pans for my kitchen.  The first set that I bought was my Sophomore year of college when I moved into a dorm with a fully functioning kitchen.  I purchased what I thought was an absolute "must have".  I bought a 10-piece cookware set from K-Mart for about $20.  It had all the pieces in the set pictured below.

I did not use them excessively, in fact, I doubt that I used them more than four times a week.  However, by the time I moved into my first apartment the following year, it was time for a new set.  This time I got one from Walmart.  Another year went by and another set was needed and I purchased it from Target.  Within three years, I'd run through 30 or more pieces of cookware and roughly $80.  It was a total waste of money. 


It finally dawned on me that the pots and pans that were still in good condition were all cast-iron hand-me-downs that I got from my mother.  They did not look pretty.  Yet, I had the best results when I used them.  Immediately I rushed to Bed, Bath, and Beyond with my 20% off coupon.  I envisioned that I'd start with the basics.  I'd get a dutch oven, a quart sauce pan, a skillet, and an 8x11 roaster for approximately $50.


I nearly ran out of the store when I saw those prices.  I knew where to go if I needed to find an awesome deal.  I went to a local thrift store and looked for good quality, heavy cookware.  While I wasn't able to find any cast iron that day,  I was able to  get a heavy frying pan that must have been made when my mom was in grade school and a brand new glass 8x11 roaster for $8.  They looked beat up and well used.  After I gave them a good scrubbing I fell in love.  

Beautiful cookware that matches is:

NICE TO HAVE


Functional cookware that will last for years and years is: 

A MUST HAVE


Smooches!


Saturday, June 30, 2012

Get Some Bacon in Your Life

I've only tried real bacon once or twice in my life. I've got to admit that I'm not a fan. It tastes like fat and grease. The only thing I found appealing was the crispy bits of flavor.  It might be because I grew up eating Sizzlean and turkey bacon, but I truly do prefer the taste of beef and turkey bacon over pork.

After I tried traditional bacon I was determined to get those crispy bits on my turkey bacon. 
I've found a fool-proof way of getting my bacon to crisp up in the microwave in just 5 simple steps.

  1. Take 1/2 of a paper towel and lay your bacon on top without any pieces overlapping
  2. Take about 3 sheets of paper towels and wrap around the bacon. Take care to make sure that the bacon is still flat and still not overlapping.
  3. Place in the microwave for 90 seconds
  4. Take out of the microwave and place 1/2 of a paper towel directly on top of the bacon
  5. Place back in the microwave for 90 more seconds
That's it; perfectly crisp bacon in 3 minutes.


Make a video of your own at Animoto.


Smooches!

Friday, June 29, 2012

The Claws Come Out At Night


This is a public service announcement.  It's been on my mind for years now.  I  finally have a place that I can place my random food and kitchen musings, and I shall use it for the good of mankind.  I hope I don't offend, but I have to get this off of my chest.

A few years ago a friend of a friend invited me to her house for dinner and to play Scattergories My friend is very particular about who she eats food from because she simply doesn't trust everyone's level of cleanliness in the kitchen.  I'm the same exact way so I trusted that her friend met her standards and I readily accepted the invitation.

I was highly impressed with how clean her house was and was over-the-moon with joy when I saw her spotless kitchen.  She and I easily made jokes with one another and there was no awkwardness at all.  On the menu was meatloaf, tossed salad, and homemade rolls.  She hadn't started preparing the meal yet so we all went off to the kitchen to keep her company.

What I saw cannot be unseen.  She opted to mix her meatloaf by hand, which is the same way I prefer to mix mine, but she wore no gloves.


You may be thinking,  "So what lots of people mix their meatloaf with their bare hands."  This is true.  However, she had long and beautifully decorated natural nails.  Although I saw her wash her hands before and after she touched the meat, I still cringed each time I saw her hand twist the meat to mix it thoroughly.

Most people do not clean under their nails with extreme care.  Let's not forget that you use your hands to clean yourself after you use the restroom.  It is imperative that all debris is removed from your hands and nails so you don't carry those germs into your food.  Typhoid Mary taught us this lesson.

I have no problem with anyone who has long nails.  I try to maintain long nails myself.  However, when I need to get elbow deep into my food I make sure to wear gloves/ to clean under my nails with deliberate care. Please do this because the life you save may be your own.  You may become slightly ill hours after you've eaten and not know the root cause.  Lingering debris under your nails may just be the culprit and something as simple as wearing these gloves could have prevented your illness.

Anyway, I could not bring myself to eat the food.  I pretended to have a toothache and nibbled on a mini bag of chips I had in my purse while they weren't looking.  To top it all off, I lost every single game we played that night. Oh well...such is life.


Smooches! 


Thursday, June 28, 2012

Taco Salad

Ingredients:

1/4 cup of shredded low-fat/fat-free cheddar cheese (or whatever shredded cheese you have on hand)
2 cups of salsa
4 cups of shredded lettuce
1/2 can of black beans (drained)
1/2 can of pinto beans (drained)
1/2 can of corn (drained)
1/4 lb lean ground beef
1/4 tomato (diced)
1/4 onion (diced)
Sliced jalapeño peppers (optional)
1 cup of water
Tortilla chips
Low-fat sour cream
Taco seasoning/black pepper/Ms. Dash (or salt) to taste


Try our slideshow creator at Animoto.


-Brown and drain meat.  Rinse under water to remove excess grease and fat and then put back into pot and sprinkle with all seasoning.
-Add corn, black beans, pinto beans, and 1 cup of water.

-Use a fork to separate meat and mash beans
-Let simmer until liquid starts to evaporate.  It normally takes 10 minutes or less.

To assemble:

-Add a layer of tortilla chips. 
-I didn't have any shredded lettuce so I used my kitchen scissors to cut up some bagged lettuce.  Place your lettuce, tomatoes, and onions on top of the chips.
-Top with tomatoes and onions
-Add one serving spoon worth of your meat/bean/corn mix
-I had one serving left of mozzarella cheese in my fridge so I used that instead of the cheddar.  Place your cheese on top of your meat and add salsa and sour cream.  If you like spicy food you can add some jalapeño slices for an extra kick.


This recipe will make about 4-5 servings depending on how much you pile on your plate.  To help me stay within the calorie range that I set for my diet, I simply use the serving recommendations on the packages that I used to cook. 

This recipe literally takes 20 minutes to make and it is so delicious and filling.  It's healthier for you because of the leaner ground beef and because you're using low-fat cheese and sour cream.  Your salsa and veggies barely add any calories and you're getting all the nutritional value of the beans. 

I actually enjoyed this meal while watching the NBA finals with my father.  We were so disappointed that the OKC Thunder lost, but at least our stomachs were smiling.


Smooches!

Sunday, June 24, 2012

Have you ever, ever, ever In your long legged life...

had a food craving so severe that you felt like your life was not worth living if you didn't get it?  Anybody?  Oh, so it's just me, then.

Picture it...South Carolina....2007. I had been slaving away at work and typing until my fingers bled (that's what it felt like!).  All of a sudden, it hit me like a bolt of lightening.  In my mind's eye, an image of the Arby's logo appeared.  In that moment, I knew the mission that I was being charged to complete.  By any means necessary, I was to obtain a roast beef sandwich, curly fries, and a Pepsi.  As all heroes do, I chose to accept that challenge.


I sought out a coworker, who I knew possessed a secret power.  He had the ability to slow down time and whiz through traffic so that I wouldn't be late returning from my lunch hour.  He and I went armed with debit cards and growling stomachs.  We were determined not to let anything get in our way.  We went; we paid; we conquered.  The only thing left to do was enjoy the spoils of war.


As I ascended the staircase in my office building I felt on top of the world.  Still, a slight sliver of dread filled my being, but I brushed it off.  I had returned to work in plenty of time to enjoy my meal in the breakroom and my food was hot and smelling great.  In a few short steps the world would be mine.


My arch nemesis, i.e. the staircase, had other plans.  It waited until I got to the very last step I had to climb and wrapped itself around my ankle.  It jostled me and try as I might, I could not hold onto my bag of food.  A sharp pain seized my chest as I watched my hot, perfectly prepared food plummet down three flights of steps.  I held out hope that the packaging would keep the food safe so I raced back down to inspect the damage.

My hopes were in vain. My food was splattered against the commercial flooring.  I'm not ashamed to admit that  piece of me died that day.  I am ashamed, however, to admit that tears fell from my eyes.  Real noticeable tears streaked down my face in front of my coworker and friend.  He actually had to console me due to the severity of my devastation.

I share this tale to help others.  The shame forced me to learn two valuable lessons that has forever since changed my life. 

1.  Always go on food missions alone.  If you fail, there won't be any witnesses.

2. If your craving is that demanding, do not pass go, go straight to eating the food immediately.


Smooches!

Wednesday, June 20, 2012

Broke Food Chronicles

Dear Akoma,

I am so broke and don't know how I'm going to be able to eat today.  I have a few things in my house to work with, but I only have $5 to feed myself for the whole day.  My refrigerator, freezer, and pantry are looking bare.  This is what I have to work with:


I've got oatmeal, coffee, a few eggs, an assortment of canned vegetables, a bag of mini-popcorn, a stick of butter, half a bag of pepper stir-fry, half a pouch of tuna and two slices of bread.  I'm short on time and creativity.  I don't know how to pull this off.   Can you help me?

---Empty Purse in Athens, GA


Dear Empty Purse,

 Don't fret!  I have some wonderful ideas that will help you get through the day.

Breakfast:


1 bowl of oatmeal, flavored with butter
1 cup of coffee

Buy: 1 orange from your convenience store @ 3/$1.  You can also ask them if they mind if you take a few packets of sugar for your oatmeal and coffee.  They usually don't mind.

Grand total for breakfast: $0.33
  
Snack:

Mini-bag of popcorn

Grand total for a midday snack: $0.00

Lunch:

1/2 pouch of tuna
1 boiled egg

Buy: A salad from McDonalds $1 menu and add the tuna and boiled egg you brought from home.


Grand total for lunch: $1.00


Dinner:


1 can of vegetables (Any from your assortment will work, but I will use sweet peas as an example)
1/2 bag of stir-fry

Buy: One package of chicken wings from your market.  You can usually find small ones for $3 or less.

I'm sure that you have some seasoning in your house.  Use whatever you like on the chicken to season (salt, pepper, garlic, etc.).  Bake the chicken in the oven covered with the remainder of your pepper stir-fry. Warm your peas in the microwave or on the stove.  The only thing you'll need to add flavor is butter.

Grand total for dinner: $3.00


Evening snack:


1 slice of toasted bread w/ butter

Grand total for evening snack: $0.00


This whole day will cost you less than $5.00 even when you include taxes.  As an added bonus, those small packages of wings usually have 6 pieces so you'll have leftovers for another day.


Smooches!


Friday, June 15, 2012

I'm Freeeeee!!!!

I distinctly remember that thought running through my head when I graduated from high school about *incomprehensible mumble*years ago.  Right after that feeling, I got scared...majorly scared.  It became oh so real that I was going to be leaving the security of my parents' home when they gave me a nice set of luggage as a graduation gift.  They meant for me to depart and never return!!! Instead of spending my time lounging by our pool and being a beach bum, I went shopping for kitchenware that I could use in my dorm.  What can I say, food has always held a special place in my heart.

I took some of the money I got for graduating and bought myself a mini-fridge with a freezer.  It looked sort of like this one, but it was smaller.


It was a lifesaver.  I was able to buy vegetables (fresh and frozen), cold cuts and condiments. If you've ever been a hungry college student you know that a sandwich is appropriate for breakfast, lunch and dinner.  Consider investing in a refrigerator like this one if they allow them at your dorm.  I'll show you some great items to keep in them in another post.

Smooches

Tuesday, June 12, 2012

Peppermint Lemonade

I love lemons. I love lemon candy. I friggin' love lemonade!!  Yes, it's that serious.  Anyway,  back in November I mentioned making peppermint lemonade for Thanksgiving.  I've been craving the refreshing drink since Summertime hit with a vengeance.  The only thing about lemonade is that if you don't drink it quickly, the flavor turns more and more acidic until it's undrinkable.  Here's a recipe for a 1/2 gallon of peppermint lemonade that will make your mouth water.

Ingredients:

3 fresh lemons
1/4 cup of fresh mint leaves (chopped finely)
1 used teabag that has already dried out
1/4 cup of sugar


Directions:

1. Put 1 quart of water into a microwave safe bowl and microwave for 5 minutes.

2. Open up your used teabag and empty the tea.  If necessary, run under a low flow faucet until it runs clear to ensure all the tea has been removed.

3. Grate the zest of 1 lemon and place into the teabag along with the mint leaves.  Fold the teabag closed and secure with a staple (or you can just tie it closed using the string from the teabag).


4. Juice the lemons in your pitcher, cut them in quarters and put them into the pitcher.  Pour the hot water in and add your sugar and tea bag and stir until sugar dissolved.

5. Add enough water to fill the pitcher, cover and let chill for 3-4 hours.


This recipe does not use a lot of sugar, but is not too bland because the sugar is added to warm water which allows it to dissolve better.  My mother is diabetic and this recipe was created so that she could enjoy it without worrying too much about her diabetes going haywire.  I prefer mine a little sweeter so I simply add a few teaspoons to my glass.

Tip:  To make this lemonade even better for the gal on the go, you can prep a few teabags and keep them in the freezer. Also, to get the most juice out of your lemon you can roll it on your counter using gentle pressure or squeeze it several times until you start to smell the oil from the lemon zest.

Smooches


Friday, June 8, 2012

Long Time No See

It's been a while since I posted anything.  However, I've still been cooking regularly and I've certainly been eating hearty meals.

The cost of food has gone up so much but I'm determined to still have good meals. I've come to find is that I have to be more creative with stretching my food budget. One of the ways I've been stretching my hard earned coins is investing in good quality aluminum foil and freezer bags.  I'm partial to Reynolds Wrap and Ziploc.  I can buy in bulk, prepare for future meals, and freeze away for future meals.  How do you preserve your food when you put them in the freezer?

Smooches